Thursday, January 3, 2008

Pattern for my Slipper Socks


I have just taken off my Slipper Socks for the first time to examine/count the stitches to give you the pattern. I HIGHLY recommend using Lion Brand Wool-Ease Thick and Quick yarn as it is the perfect thickness for warm slippers, comes in great colors and since it is so bulky it takes only a few hours to whip these up. I used a K hook and basically only sc stitches.

(This pattern is worked in continuous rounds)

The Pattern:

Chain 3 and join together to form a ring by working a slip stitch into the first chain made

1. Chain 1, work 6 sc into ring [6 sc]


2. Work 2 sc in each of the next 6 sc [12 sc]


(An example of continuous rounds. Instead of slip stitching into the first sc, and then chaining one, I just sc'd into the first sc and continued single crocheting around and around. Does that make sense?)


3. Work 1 sc into next sc and then 2 sc into the sc after that and repeat into next 12 sc [16]

4. Work 1 sc into next two sc, and then 2 sc into the sc after those and repeat

5. Continue to increase stitches until you can put your toes into the circle and fold it and everything fits comfortably.

(Ahhh roomy but not too wide... a perfect fit)


6. Once you reach that point sc in each sc around and around till your sock reaches where the gray is on my sock (where your ankle starts).

( Check out where I am pointing! Thats where you should stop crocheting around. At the end of the gray yarn and coincidentally where my finger is pointing!)


7. Then sc in half of the next sc's. So lets say you have a tube of 20 sc's (the size of my slippers), sc in next 10 - 12 sc's. Then STOP. Do not continue stitching around and around, you are now making the bottom of the slipper and are working back and forth in rows.

8. Turn, Ch 1 skip first sc and sc in every sc

9. Turn, Ch1 skip first sc and sc in every sc

( Rows 7 through 9 are demonstrated by the dark orange yarn. The light orange is a good demonstration of Row 10. Especially at the end)


10. As you get closer to the end of the heel. Ch 1, 1 sc in first sc, 1 sc in each of remaining sc, 2 sc in the Ch-1 at edge

11. Repeat row 10.

12. When your bottom goes past your heel, fold the heel end of the slipper in half, with the wrong sides together and join the back heel seam. I just sc'd through the two sides and fastened off.

13. You should have something that resembles a Turkish slipper.

14. Join the yarn to the top of slipper and continue to sc in every sc round and round till you reach the desired height of the slipper.

I hope this pattern was everything you hoped for and more. Comment if you don't understand anything, or if you need more directions, I know I'm not the best at writing out patterns.

I hope your feet will be as toasty and happy as mine are! :)

Tuesday, January 1, 2008

Happy New Years! AND Slipper Socks!

Woohoo! Happy New Years everyone! I hope everyone had a great New Years and spent it exactly how they wanted to. I spent mine with good people AND I got some crocheting done earlier in the evening. So basically it was pretty perfect. Also my New Years dress was pretty and comfy and that was pretty perfect too.


As for the crocheting... WELL. Basically my mom keeps bugging me to wear slippers around the house, which is hard because I'm not used to that and I keep losing them. Also they are annoying. Unfortunately my feet tend to get absolutely freezing ALL the time. No no, its not because I walk around bare foot, I deny this. It must be some weird unexplained medical phenomenon that causes the temperature of my feet to fall below freezing. That must be it. Maybe I'll be in the New England Medical Journal soon and will get all famous and then you can brag to your friends about how you actually KNOW me. Or read my blog. Same diff.


So I crocheted myself up some slipper socks. They were amazingly easy to make once I stopped looking at "How to crochet a sock" websites and decided to wing it. Amazingly easy. Like no counting stitches, no memorizing what to do next kind of easy. They came out big and bulky and silly and warm -> which was exactly what I wanted. I also sort of mucked up the heels a bit and made them a tiny bit bigger then they should be, but its ok, they don't look too weird and I'm thinking about lining them with my leftover black fleece so they will be even MORE warm. Amazing. I know.


Best part is, I used mainly the leftover yarn from all my hat projects. I had several little balls of Wool-Ease Thick and Quick yarn left over, and they weren't long enough to make any hats, or be the trimming for any hats... yet they were too long and pretty to throw away so I decided to use them. Well I guess I could have made a funky scarf but my feet were cold and thats often when inspiration strikes.

If you want the tutorial it can be very simply added, its just late so I am not going to do it right now. :)

Tuesday, December 25, 2007

Black Curacao Shawl -> New Photos!


So for my grandma this Christmas I decided to crochet the "Blue Curacao Shawl" from the "Amazing Crochet Lace" book by Doris Chan. I bought the book several months ago and had not done a single project in it, mainly because at the time of the purchase I had not yet discovered my aversion to unoriginal projects. Don't get me wrong, the shawl is beautiful, the pattern was easy to read and I whipped it up in two days. My grandmother loves it. It's just the only thing that's different between my shawl and the shawl in the book.... is the color. I don't mind using other peoples patterns as long as I switch up the color, or use a different yarn... something to make the pattern more tailored to my tastes.... and not just another cookie cutter copy (I'm not even sure if that last cookie part makes sense but it sounds so great!). I have no photos of my grandmother modeling it yet, mainly because I finished the project about an hour after we exchanged presents and then I had to wet block it.


Don't mind the two tone background behind the shawl, I just needed two towels to stretch it out on. Happy Holidays!

Thursday, December 20, 2007

Finals Over = Giraffe Hat MANIA!!!

Finally finals are over. Ugh. This week was one of the most intense weeks of my college career both mentally and physically. I can't even count how many allnighters I pulled, but currently I have no voice, a runny nose and I have been nauseous all day. The worst part is (yeah there is a worst part, I know, right... what am I going to pull out of my hat now? Kitten in a coma?) that I am hungry but am nauseous at the same time. Ok sort of anticlimactic, I know. But I haven't eaten since I ate fries with Rose yesterday at like 5. That's it, that was the last thing I ate. Ridiculous, I know. But you know, you have to look at the bright side of things. I'll be REALLY skinny if this keeps up. Or dead. You know one of the two.


So for I finished the Giraffe Hat I was making for Rose for Christmas and I think it came out pretty good. I'm currently working on finishing lining her matching scarf and then she will surely be the coolest kid at the playground. Or the Zoo. But at one of those locations she will win the prize for sure. Here she is doing her mad sexy 80s Giraffe mating dance:


Nice moves. Real nice. I know what your thinking. Well no I mean I know what you will be thinking after you stop thinking all those pervy things about Rose. The horns are too long. I keep thinking that too. Well actually I don't think that until I see them in photos and then I think it. Oh well, check out the sweet pompoms!

I will post photos of actual finished scarf later. I won't bore you with photos of like a corner of an unfinished scarf anymore. No, from now on... I'm a professional. Ok I gtg watch 30 Rock and try to eat something

Saturday, December 1, 2007

Lining Hats

Sorry I haven't posted in a while, exams got hectic and also lately I haven't been really designing anything new crochet-wise. Mainly just crocheting up promised hats to friends based on the hat pattern I had previously posted here. I tweak them to make them more individual, like making the front flap more rounded, or the ear flaps larger/smaller, switching up colors, making them without stripes.... so on and so forth. But it's still basically the same hat. I am pretty sick of hats actually. The only thing that makes making them fun is lining them, which I have just started doing.
It's all because my little brother had been complaining that his Dragon hat is itchy, which surprised me because I never really found the Wool-Ease Thick and Quick that itchy for acrylic yarn. In fact I was a tad insulted and began to doubt my crocheting skills. Thoughts like "He was lying to me, he hates my hat!" and "I am a horrible horrible crocheter if I can't even crochet a hat for a five year old" invaded my mind and caused much torment and undoing of hats. Then after hanging around him for a few days during Thanksgiving I began to doubt my logic of "Saying it doesn't feel nice equals he hates it". Mainly because that would mean he hated his coat. He hated is shoes. His sweater, his mittens and even his underwear were offensive to him. The book called "A porcupine named fluffy" aroused the deepest sentiments of loathing in him for the pages were much MUCH too stiff. So that's when I decided to learn how to line hats. I don't think I could have done it without Norma and her easy online tutorial.
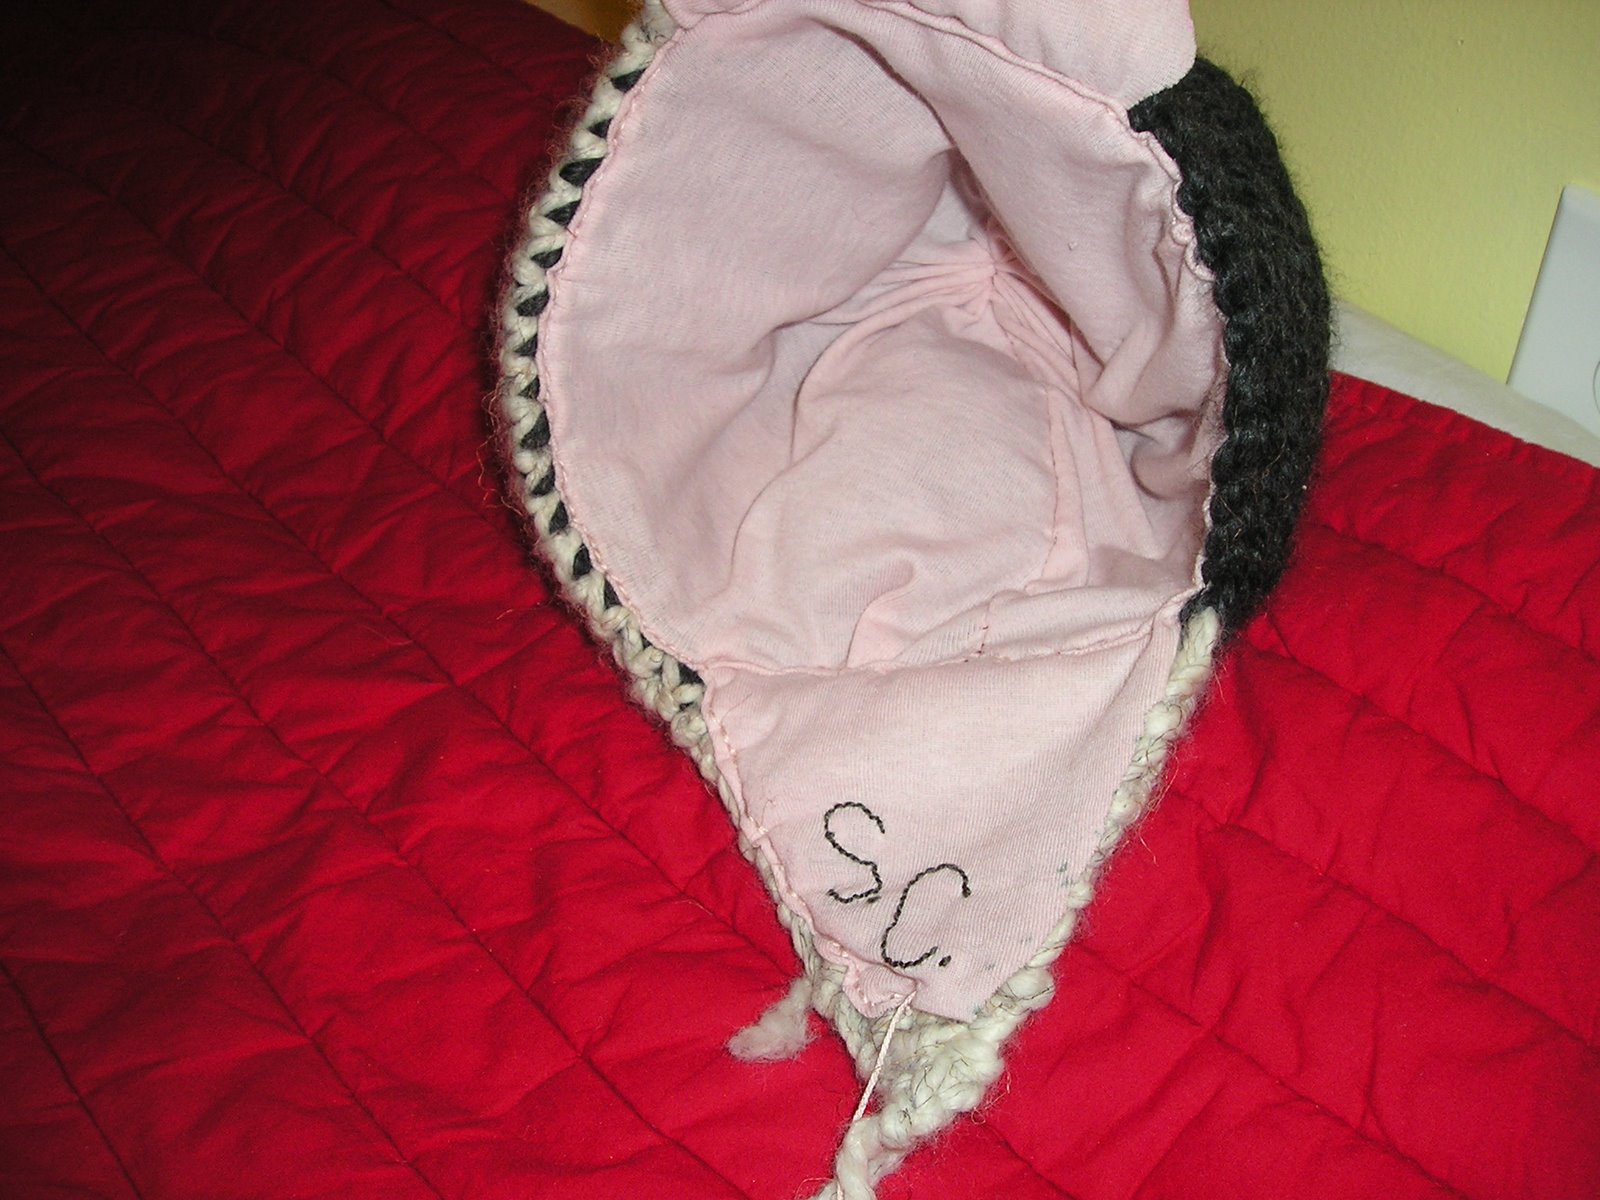
My first attempt was with my friend Sarah's Hat, but the lining wasn't fleece, it was actually jersey so it was a little difficult at first to size it correctly. I used light pink embroidery floss and a reverse backstitch (which I had to learn but am now obsessed with). I don't think it came out too bad. What do you think?

Hmmm in second thought that's not exactly the world's greatest photo of it. It looks sort of bunchy and not good. But look at the front of the hat that has that beautiful display of reverse back stitch seaming and not the back of the hat which displays what happens when I realize that width-wise I have some extra fabric but length wise its a bit short. Important thing is, is it fits well, its not baggy or too tight when on, and you can't see the lining from the outside except hopefully a hint of it when I finish the ear flaps. Also my second task is to figure out how to cut fabric in a trapezoid but with ear flaps shape. This is a bit complicated as it involved buying whole yards of fabric and not 1/4 yards like I do (I am an extremely broke college student! Don't judge me!).

This is how my little brother's hat is looking. Except a tad less orange. I see this is my slightly artistic shot in where I don't use flash. Nice. Wow its fuzzy too. For those people whose vitamin C daily intake I have just upped by 40%, you are welcome and also, do not worry this is the inside of the hat. THE HAT IS TURNED INSIDE OUT! Let me try to find a less fuzzy better close up of the seams I suspect I have. No No I do not. Never mind. Just imagine the most beautiful stitches you have ever seen, and I assure you, they are in/on that hat. Poetry in motion. Yay!

Saturday, November 17, 2007

DRAGON SCARF! Finally!

It turns out my boyfriend had my camera in his room even though I called him before I even started searching and he said he didn't have it. So I searched my entire room, then I logged on to Craftster.org , read all the wonderful comments that were made on my Dragon Hat post and then I literally tore my room up all over again looking for the camera, so excited was I to show off my Dragon Scarf. So here it finally is! TADA:

Imagine that paired with my little brothers Dragon Hat. I think it will look cool. I also just realized that I am wearing the same sweatshirt in all of my photos but thats because that's my lounging gear. I often crochet when I lounge.

I crocheted this with my standard thick and quick wool-ease yarn. For the flame I crocheted the bottom flame in one piece and then layered some crocheted triangles and smaller crocheted flames on top of it. I can probably whip up the actual pattern but it basically consisted of a lot of increasing and decreasing. Here are some close ups of the scarf:

Also for the flame I found some old dark red yarn I had (not thick and quick) and slip stitched around the bottom edges and the top middle line twice and around the other edges once. I slip stitched twice around the bottom and top middle line twice because the orange showed through too much after I only slip stitched once, I thought. But then I got lazy and didn't end up slip stitching twice along any other edges. Also you can't see it, but I bought some shiny/sparkling metallic red thread and sewed it across the middle line.


I made the scarf itself thin enough to wrap around Georges (my little brother) neck. I basically just single stitched two rows of one color, then two rows of the other and so on and so on. It was 8 stitches across total I think. I also lined it with green flannel, so that it wont be too scratchy (even though I don't think the yarn is scratchy at all, but you know little kids). It was my first time lining anything, but I don't think it came out too bad. A little bunchy perhaps.


I also embroidered Georges name into it but it came out crooked! I let it stay that way though because I was lazy and I am a very inexperienced embroiderer. Also the main reason I embroidered his name into it was because I didn't want him to lose it in kindergarten, though upon further contemplation I realized that probably not many other kids would have a dragon hat and scarf ensemble.I lined the scarf and mouth with yellow yarn because I wanted to hide the edges of the lining a bit and also because I wanted to make the mouth part a bit bigger so that it was more proportional to the flame.


I also crocheted two teeth/fangs with thick and quick wheat colored yarn but I'm not sure I like how the came out all that much. The mouth itself was made by increasing stitches after wrapping it twice around my neck and figuring it was time. So I increased stitched until it looked wide enough for the fire to come through (which was around 14 stitches I think). Then when crocheting the next row, I only crocheted 6 stitches, then turned then crocheted another 6 stitches and I did that until it was long enough for the scarf to get through. Then I slip stitched down the middle side, slip stitched in the 7th and 8th stitch of that row and then singled stitched 6 stitches, turned, and repeated until it was approximately the same length as the other part. Then when it was the same length I just did one full row of color (14 stitches), 6 single stitches on each side and two chains in the middle.

Actually what I think would work even better, (because my mouth came out a bit too big and I had to stitch the two sides together at the top and bottom and also had to slip stitch around the mouth area), was if you didn't even skip any stitches, if you just single stitched 7, then turned and single stitched 7, and so on and so on, following the instructions above. I think that might look better and not end up as big as mine did. Though in my defense I was making this pattern up, and it WAS easy to fix.

The yellow scales around the mouth were just made by single stitching triangles with the base of 5 stitches, then fastening them off on top and starting a new triangle. I tried just single stitching down the side of a triangle after I was done with it, but then they weren't as sharp and I didn't want particularly rounded edges.

So there it is, my imagination brought to life! I hope you like it. I also really really hope he likes it!